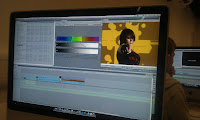
In the morning I attended the Beginners Taster Workshop in Final Cut Pro, this was a two hour long workshop. Despite in the first half an hour of the master workshop the host went over pretty much everything he taught us in the beginners class, it was still a good decision to go to the beginners workshop as we had more time to use and get familiar with each tool. During the workshop I learnt new techniques which feature “A/B editing” and the “Toggle Clip Overlays” tool. “A/B editing” is where you can switch between the mouse cursor to the eraser cutting tool by simply pressing the “a” and “b” key on the keyboard. “Toggle Clip Overlays” is a tool which can be found in the bottom left of the program, thus shows the volume of each audio and video clip the editor can then change the volume levels, add volume fade ins and outs by pressing the pen tool (shortcut “p”) and clicking on the part before or after he/she wants to change the volume level.
In the afternoon I attended the Editing Master Class in Final Cut Pro, this was a two our long workshop. During this workshop I learned several key tools which could help me during the coursework task these features where: “Chroma Key”, “Key framing”, “Garbage Matte” and “Colour Correct”.
 “Chroma Key” removes the green screen as well as backgrounds and replaces it with the editors chosen background, which could be an image or a pre-recorded shoot. Whilst using this tool it is useful to use the crop tool (shortcut “c”). To use the crop tool select the wanted clip then the image button located in the canvas screen to the bottom right, then click on image and wireframe. After this has been selected a blue box should appear in the canvas with a cross in the middle, to crop the clip move the blue lines inwards until the unwanted area has been cropped out. After the clip has been cropped the image needs to be put into the timeline in the line called V2, then put the wanted background into V1 (underneath V2).
After this go to effects > Video Filters > > Key > Chroma Key. Then select the clip wanted (this opens it in the viewer window) then click on the Chroma Key tab, thus reveals three options: “Colour”, “Sat” (Saturation) and “Luma”. These three options remove most of the green screen background behind the subject. After this there should be a green halo surrounding the subject the three other options (“Edge This”, “Softening” and “Enhance”) are used to remove this.”Edge This” and “Softening” are to remove the remaining Halo. “Enhance” replaces the green halo with a red halo which at one stage cancels out each other.
“Key framing” is used to move text, which can be added to the timeline by selecting the option in the bottom right hand corner of the viewer and then selecting text and then text again, onto or off the screen. To use this highlight the text > Add Motion Key frame (Diamond option in the canvas - Shortcut “K”) > Shift Key and slide to whichever side you want the text to be on (Use the middle of the square box where the cross meets)
“Garbage Matte” is used like the crop function but it is a more accurate way to edit clips. To use thus function, select the clip > effect > video filters > Mattes. After that click filters in viewer > click on one of the eight key frames at a time and grab the respective cross hairs to edit the wanted area > when this portion of the clip is done click the right arrow key till the subject has moved out of the position previously selected > move key frames into the new position needed so the subject isn’t being cropped out > repeat procedure
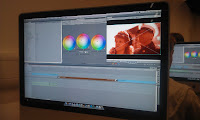
 “Colour Correct” allows the editing of the colour in each clip if the lighting isn’t the same through the duration of the footage (unless it has been edited or designed like that). In order to do this select the clip > effect > video filters > colour corrector > 3 Way Colour Corrector. In “3 Way Colour Corrector” there are three wheels: Black, Mids and Whites. Black is tended to be used for underexposed parts whereas whites is used for overexposed parts. These three wheels can also be used to make a precise colour dominate in the clip.
In “colour correct” there is also a “Saturation tool” which effects how much colour is in the clip. Decreasing the saturation allows for a black and white clip compared to increasing the saturation produces a more colourful clip.
In conclusion I thought this was a good trip to go on and should help to improve my editing as well as allowing myself to use new techniques for the coursework task.
No comments:
Post a Comment
Please ensure any comments are appropriate for publication.